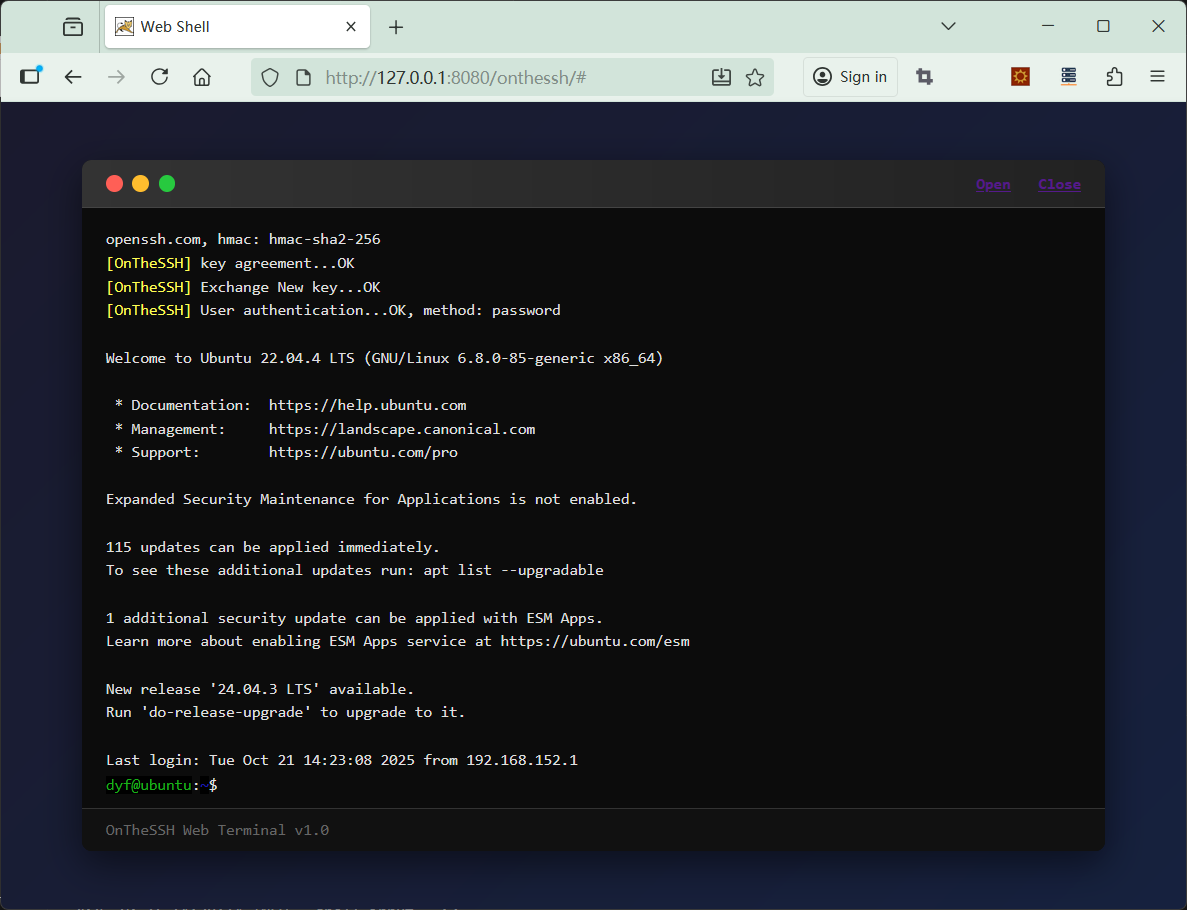
The above picture shows the page display after SSH login to a Linux system (Ubuntu). There are two link buttons, “Open” and “Close”, in the upper right corner of the window. Clicking “Open” will initiate the connection and login to the Linux remote host, and clicking “Close” will close the connection to the remote host.
The pages of the Shell terminal window are described in the html and javascript of the index.html file. The index.html file consists of three parts:
- Lines 7 to 134, CSS styles contained by the
- Lines 137 to 156, the page layout contained by the tag
- Lines 158 to 649, javascript contained by the
I don’t have much to elaborate on css styles and div layouts. Although I’m an experienced programmer, I basically have no experience in writing html pages. The final page effect looks okay, mainly thanks to the help of deepseek. In the css section, you can pay a little attention to these styles:
- * — Define fonts and font sizes
- .terminal-line — Ordinary line text style
- .terminal-line-cursor — The text style of the cursor line
- .cursor — Cursor style
- @keyframes cursorBlink — Cursor flashing
Let’s focus on the Javascript part. For programs like shell terminals, how to interact with remote Linux hosts is of Paramount importance.
Global constants and variables
At the beginning of the <script> tag, several global constants and variables are defined:
let addr = "192.168.152.152:22";
let user = "dyf";
let passwd = "dyf";
let rows = 24;
let cols = 120;

let session_id = "";
let seq = 0;

let cx = 0;         //Cursor position x (Range: 0 ~ cols)
let cy = 0;         //Cursor position y (Range: 0 ~ rows)
let cs = false;
These lines define the address, port, login username and password of the remote Linux host. For simplicity, these parameters are hard-coded here. You can extend these constants according to your business needs.
- rows and cols — Indicates the maximum number of lines and columns of text that can be displayed in the current terminal window (the appropriate values need to be calculated based on the window size, as well as the font and font size)
- session_id — The session ID after a successful SSH login
- seq — The sequence output by the terminal (the role of seq was explained in the previous chapter)
- cx & cy — The position of the cursor in the terminal window, where cx represents the column and cy represents the row
- cs — Is the cursor displayed?
Ajax interface
Javascript interacts with the backend and is encapsulated in these several Ajax interface functions:
1)function open_session() — Create the session
In the SSH protocol, creating a shell terminal requires multiple steps such as establishing a socket connection, negotiating keys, creating channels, and login verification. Here, all these steps are uniformly encapsulated in the open_session() function.
| Example | Explanation | |
| Send data | { “addr”: “192.168.152.152:22”, “user”: “dyf”, “passwd”: “dyf”, “rows”: 24, “cols”: 120 } | addr — The address and port of the remote host user — ssh login username passwd — ssh login password rows — Window characters height cols — Window character width |
| Back data | { status: true, session_id: “shell-87c07b1f-b45a-479e-b7d7-65289b87f73c”, err_msg: “”, } | status — “true” indicates that the session was created successfully, while “false” indicates that the creation failed session_id — Return when status is true err_msg — Return the reason for failure when status is false |
| Backend Url | /onthessh/OpenSession |
2) function close_session() — Close the session
| Example | Explanation | |
| Send data | { “session_id”: “shell-81768f43-9620-42eb-8ae5-24769e223e21” } | |
| Back data | None | |
| Backend Url | /onthessh/CloseSession |
3)function stdout() — Obtain the output of the shell
In the previous chapters, the role of the parameter seq in sending data was described.
The returned data is a page description similar to html, composed of <head> and <body> tags, and the entire window is drawn by parsing these tag descriptions.
| Example | Explanation | |
| Send data | { “session_id”: “shell-81768f43-9620-42eb-8ae5-24769e223e21”, “seq”: 0 } | seq — Request Sequence |
| Back data | { “status”: true, “page”: “<head>…</head>\r\n<body>…</body>” } | status — true indicates success, false indicates failure page — A page description similar to html |
| Backend Url | /onthessh/Stdout |
The difference between stdout() and other interfaces is that it requires continuous polling.
const POLL_INTERVAL = 200; //200 milliseconds
let isProcessing = false;
let pollInterval = setInterval(stdout, POLL_INTERVAL);
function stdout()
{
    if (session_id == "") return;
    if (isProcessing) return;

    isProcessing = true;
    // console.log('poll...');
POLL_INTERVAL defines the polling interval as 200 milliseconds. The isProcessing variable ensures that only one stdout background request is running at a time. setInterval() drives the operation of polling.
4)function stdin(chars) — Terminal input
All the input comes from keyboard tapping. When we tap the ‘pwd’ command at the cursor in the window and press Enter to execute it, we are actually sending four characters in sequence to the remote Linux, namely: ‘p’, ‘w’, ‘d’, and ‘\r’.
When the remote host receives the ‘p’ character, it adds the ‘p’ character to the end of the terminal output and controls the cursor to move one character to the right. It’s just like when we directly input the ‘p’ character into the window.
When the Enter key is pressed, the Stdin interface sends the ‘\r’ character to the background. After receiving it, the remote Linux host parses the previously continuously input ‘pwd’ into a command and executes it. The execution result is output on the next line in the terminal window and a new line is added at the end, containing ‘dyf@ubuntu: Move the cursor position to after ‘$’.
| Example | Explanation | |
| Send data | { “session_id”: “shell-81768f43-9620-42eb-8ae5-24769e223e21”, “chars”: “ls” } | chars — Enter characters (for example, ‘ls’ is a file list command) |
| Back data | None | |
| Backend Url | /onthessh/Stdin |
5) function scroll(lines) — Scroll window
The scrolling window is not part of the SSH protocol. It performs view scrolling on the output page cache in the core module, controlling the pages obtained by the Stdout interface to be exactly within the range of rows and columns that conform to the shell window.
| Example | Explanation | |
| Send data | { “session_id”: “shell-81768f43-9620-42eb-8ae5-24769e223e21”, “lines”: 3 } | lines — Number of lines to scroll (positive numbers scroll down, negative numbers scroll up) |
| Back data | None | |
| Backend Url | /onthessh/Scroll |
6) function window_size_change(rows, cols) — Window size change
When the size of the shell window changes, the number of lines and columns that the window can accommodate will also change. This change needs to be immediately notified to the remote Linux host, and the Linux host will rebuild the window output based on the new number of lines and columns.
The index.html only provides the window_size_change() interface and does not implement the shell window size change event.
Changes in font and font size can also cause variations in the number of rows and columns in the window. This point should be noted.
| Example | Explanation | |
| Send data | { “session_id”: “shell-81768f43-9620-42eb-8ae5-24769e223e21”, “rows”: 30, “cols”: 150 } | rows – New number of rows in the window cols – New number of window columns |
| Back data | None | |
| Backend Url | /onthessh/WindowSizeChange |
Draw the terminal window
The parsing of the terminal output is in the function parse_page(page) :
function parse_page(page)
{
    //head----
    let a = page.indexOf("<head>") + "<head>".length;
    let b = page.indexOf("</head>");
    let head = page.substring(a, b);

    //error
    if (head.indexOf("<error>1</error>") != -1)
    {
        close_session();
        return;
    }

    //seq
    a = head.indexOf("<seq>") + "<seq>".length;
    b = head.indexOf("</seq>");
    let head_seq = parseInt(head.substring(a, b));
    if (seq == head_seq) return;    //If the seq values are the same, ignore this page data
    seq = head_seq;     //update seq
    // console.log("RSP SEQ:", seq);

    //cursor position
    a = head.indexOf("<cxy>") + "<cxy>".length;
    b = head.indexOf("</cxy>");
    let cxy = head.substring(a, b);
    let ss = cxy.split(";");
    cx = parseInt(ss[0]);
    cy = parseInt(ss[1]);

    //is the cursor displayed
    cs = head.indexOf("<cs>1</cs>") == -1 ? false : true;
First, parse the <head> section. If “<error>1</error>” exists in <head>, it indicates that an exception has occurred in the current session (mostly due to network or remote Linux errors).
Next, parse the seq. If the seq value in <head> is the same as the requested seq (the seq sent by the Stdout interface), it indicates that the output of the terminal window has not changed, and thus no further parsing is needed. If the seq value is different, it indicates that the output of the window has changed.
The <cxy> tag describes the cursor position, and the <cs> tag describes whether the cursor is displayed. After parsing is completed, the global variables cx,cy, and cs need to be updated.
    ......
   //body----
    a = page.indexOf("<body>") + "<body>".length;
    b = page.indexOf("</body>");
    let body = page.substring(a, b);

    //Ignore these tags (of course, they can also be used)
    body = body.replaceAll("<b>", "");      //<b> & </b> - bold
    body = body.replaceAll("</b>", "");
    body = body.replaceAll("<u>", "");      //<u> & </u> - underline
    body = body.replaceAll("</u>", "");
    body = body.replaceAll("<f>", "");      //<f> & </f> - text flickers
    body = body.replaceAll("</f>", "");

    output.innerHTML = '';  //clear

    //lines
    let lines = body.split("<br/>");
    for (i = 0; i < lines.length; i++)
    {
        line = lines[i];
        // console.log('i:', i, " - ", line);
        displayLine(line, i);
    }

    //cursor
    if (cs == true)
    {
        displayCursor();
    }
}
The parsing of the section, for simplicity, has omitted the parsing of bold (<b>), underline (<u>), and character flashing (<f>). In formal applications, this part can be improved to make the shell window display more detailed.
The <br/> tag divides the text content into lines. Through line traversal, the displayLine() function is called to draw the text content line by line.
If the <cs> description wants to display the cursor, call the displayCursor() function to draw the cursor.
function displayLine(line, lineNo)
{
    line = line.replaceAll("</fc>", "</span>");
    line = line.replaceAll("</bc>", "</span>");

    //fore-color tag
    while (true)
    {
        let a = line.indexOf("<fc#");
        if ( a == -1) break;
        let b = line.indexOf(">", a);
        if ( b != -1)
        {
            let tag = line.substring(a, b+1);
            line = line.replace(tag, colorStyle(tag));
        }
    }
    ......
In line parsing, it is necessary to parse the foreground color of the text described by the <fc#n> tag and the background color of the text described by the <bc#n> tag. Here, ‘#n’ represents color encoding. The color encoding is escaped to the 16-bit color encoding of html through the colorStyle() function. The specific conversion can be based on the pre-defined color style. For simplicity, only one color style is provided here:
| encoding | html color |
| #0 | #B2B2B2 |
| #1 | #000000 |
| #2 | #000000 |
| #3 | #B21818 |
| #4 | #18B218 |
| #5 | #B26818 |
| #6 | #1818B2 |
| #7 | #B218B2 |
| #8 | #18B2B2 |
| #9 | #B2B2B2 |
| #10 | #B2B2B2 |
| #11 | #000000 |
| #12 | #686868 |
| #13 | #FF5454 |
| #14 | #54FF54 |
| #15 | #FFFF54 |
| #16 | #5454FF |
| #17 | #FF54FF |
| #18 | #54FFFF |
| #19 | #FFFFFF |
To sum up, for a row of data in , the conversion result is equivalent to:
This is a line of text<fc#0>foreground color</fc><bc#1>background color</bc><br/>
<!-- Convert to -->
<div class="terminal-line">This is a line of text<span style="color: #B2B2B2;">foreground color</span><span style="color: #000000;">background color</span></div>
Draw the cursor
The displayLine function introduced earlier has a second parameter, LineNo, which represents the line index where the cursor is located. Both the line content and the cursor are drawn using <div>, so the cursor line should allow two <div> to be drawn on the same line. The style of the line where the cursor is located has an additional “position: relative;” The property allows the cursor <div> to float on it.
The function corresponding to the code drawn by the cursor is displayCursor() :
//display cursor
function displayCursor()
{
    const divs = document.querySelectorAll('#terminal-output div');  //all div lines
    if (divs.length < cy) return;

    let line = divs[cy];            //cursor line div

    const cursor = document.createElement('div');
    cursor.className = 'cursor';

    let char_width = charWidth();
    // console.log("char_width:", char_width);
    cursor.style.left = char_width * cx + 'px';
    line.appendChild(cursor);
}

function charWidth()
{
    const span = document.createElement('span');
    span.style.fontFamily = 'Consolas, monospace';
    span.style.fontSize = '13px';
    span.style.whiteSpace = 'nowrap';
    span.style.visibility = 'hidden';
    span.style.position = 'absolute';

    const testChars = 'abcdefghijklmnopqrstuvwxyzABCDEFGHIJKLMNOPQRSTUVWXYZ0123456789';
    span.textContent = testChars;

    document.body.appendChild(span);
    const totalWidth = span.offsetWidth;
    document.body.removeChild(span);

    return totalWidth / testChars.length;
}
The ‘charWidth()’ function calculates the pixel distance between the cursor <div> and the left side of the terminal window. First, create a hidden <span>, and note that the font and size in this <span> should be consistent with those in the terminal window. Then, input a piece of text in the <span> and calculate the average character pixel width of this text. With this character width, multiply it by the column where the cursor is located (cx), and the offset pixel value of the cursor <div> can be calculated.
Keyboard input
Keyboard events and mouse wheel events are in the addEventListener() function:
// input for Keyboard and mouse wheels
document.addEventListener('DOMContentLoaded', function() {

    // init terminal
    function initTerminal()
    {
        // Listen for keyboard input
        document.addEventListener('keydown', handleKeyDown);

        // Listen for mouse wheel input
        document.addEventListener('wheel', handleWheel);
    }
    ......
In the initTerminal() function, two event listeners, the keyboard and the scroll wheel, are registered, and their handling functions correspond to handleKeyDown and handleWheel respectively. In the handleKeyDown function, the most important thing is the encoding for special keys. Special keys are divided into two categories: Ctrl+ special keys and special keys, as follows:
if (event.ctrlKey)  //Ctrl
{
    switch (key)
    {
        case "Space":       inputChars = "\x00";        break;
        case "ArrowLeft":   inputChars = "\x1b[1;5D";   break;
        case "ArrowRight":  inputChars = "\x1b[1;5C";   break;
        case "ArrowUp":     inputChars = "\x1b[1;5A";   break;
        case "ArrowDown":   inputChars = "\x1b[1;5B";   break;
        default:            inputChars = "";            break;
    }
}
else
{
    switch (key)
    {
        case "Enter":       inputChars = "\r";     event.preventDefault();     break;
        case "Tab":         inputChars = "\t";     event.preventDefault();     break;   // Prevent the default focus switching behavior
        case "Space":       inputChars = " ";           break;
        case "ArrowLeft":   inputChars = "\x1b[D";      break;
        case "ArrowRight":  inputChars = "\x1b[C";      break;
        case "ArrowUp":     inputChars = "\x1b[A";      break;
        case "ArrowDown":   inputChars = "\x1b[B";      break;
        case "Home":        inputChars = "\x1b[H";      break;
        case "End":         inputChars = "\x1b[F";      break;
        case "Insert":      inputChars = "\x1b[2~";     break;
        case "Delete":      inputChars = "\x1b[3~";     break;
        case "PageUp":      inputChars = "\x1b[5~";     break;
        case "PageDown":    inputChars = "\x1b[6~";     break;
        case "Pause":       inputChars = "\x1a";        break;
        case "Escape":      inputChars = "\x1b";        break;
        case "Backspace":   inputChars = "\x7f";        break;
        case "F1":          inputChars = "\x1bOP";      break;
        case "F2":          inputChars = "\x1bOQ";      break;
        case "F3":          inputChars = "\x1bOR";      break;
        case "F4":          inputChars = "\x1bOS";      break;
        case "F5":          inputChars = "\x1b[15~";    break;
        case "F6":          inputChars = "\x1b[17~";    break;
        case "F7":          inputChars = "\x1b[18~";    break;
        case "F8":          inputChars = "\x1b[19~";    break;
        case "F9":          inputChars = "\x1b[20~";    break;
        case "F10":         inputChars = "\x1b[21~";    break;
        case "F11":         inputChars = "\x1b[23~";    break;
        case "F12":         inputChars = "\x1b[24~";    break;
        default: console.log("====key:", key);          break;
    }
After special key encoding conversion, the Stdin() interface function is called to send the key value to the background.
Mouse scroll event
滚动的处理函数是handleWheel().
// Handle wheel input
function handleWheel(event)
{
    const deltaY = event.deltaY;
    const deltaMode = event.deltaMode;
    console.log("deltaY:", deltaY, "deltaMode:", deltaMode);

    if (deltaMode == 0) //0: px, 1: line, 2: page
    {
        let lines = deltaY > 0 ? Math.floor(deltaY / 100 * 3) : Math.ceil(deltaY / 100 * 3);
        console.log("scroll lines:", lines);
        scroll(lines);
    }
}
event.deltaY is the pixel value of the mouse wheel each time it scrolls (“Gada”), approximately 100px. Therefore, the number of scrolling rows should be divided by 100 and then multiplied by 3. Scrolling three lines each time is the default value for most shell terminals. Of course, you can also adjust this value.
Final explanation
The index.html has less than 700 lines of code in total. If you want to implement the original xterm control sequence, this amount of code is far from sufficient. OnTheSSH has carried out a large amount of conversion work internally, enabling the traditional complex shell terminal to be implemented with simple html + CSS + Javascript technologies.
For simplicity and educational purposes, the Web shell terminal window of index.html only implements the most basic functions. Compared with the OnTheSSH App, it lacks extended functions such as copy and paste, color and style switching, input method input, and command help. In practical application, You can refer to the source code of OnTheSSH (Qt/C++ part) to implement these extended functions.
If you have any questions, you can email me at gzmaike@onthessh.com